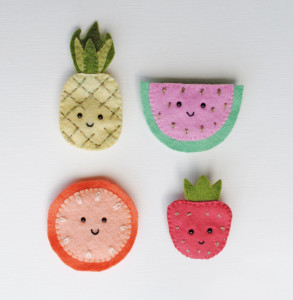
At the peak of the warm summer months, who wouldn’t love a little fruit salad? In the form of a pin, that is! I present to you a printable sewing pattern to make these adorable felt fruit brooches – watermelon, pineapple, strawberry, and orange slice!
Theses fruit brooches are the perfect companion to any fun summer outfit! Pin them to your clothing, or to a bag! You could even give them away as summer party favors!

Tools and Supplies:
- felt brooches sewing pattern
- colored felt (try rockin red, pink violet, or buttercup)
- needle and thread
- embroidery thread
- doll eyes or beads (optional)
- pin backing
- pliers (optional)
- glue gun (optional)
DIY Craft Project: How To Sew Felt Fruit Brooches!
Felt Strawberry Pin!
Begin by using my printable sewing pattern to trim the pieces from red colored wool felt.
Mark onto the felt where you want to place the eyes and mouth onto the strawberry. Yes, you can draw straight onto the fabric. Even place the face on top of the marking, or flip it around and sew your drawing to the inside of the brooch.
When you’ve found the perfect face placement, it’s time to install some eyes!
I’ve used some black plastic doll eyes. These eyes have a post that inserts through the felt with a small washer to hold them in place.

To install safety eyes you simply make a small hole where you want the eye to sit. Insert the post and push the washer backing on with pliers. Once the washer is firmly in place you can snip the end of the posts off.

If you don’t want to use safety eyes, or they simply aren’t available to you, no worries! There are alternatives!
You can also choose to simply draw or paint the face onto your strawberry brooch! You can use embroidery thread to sew the eyes on, or even use beads or tiny buttons instead!

Next I sewed in the tiny mouth, and added some seeds! I made the seeds with embroidery thread split down to 2 strands, and using a single chain stitch (or lazy daisy).
Next I pinned and sewed the top of the strawberry into place, onto the back piece of the brooch.

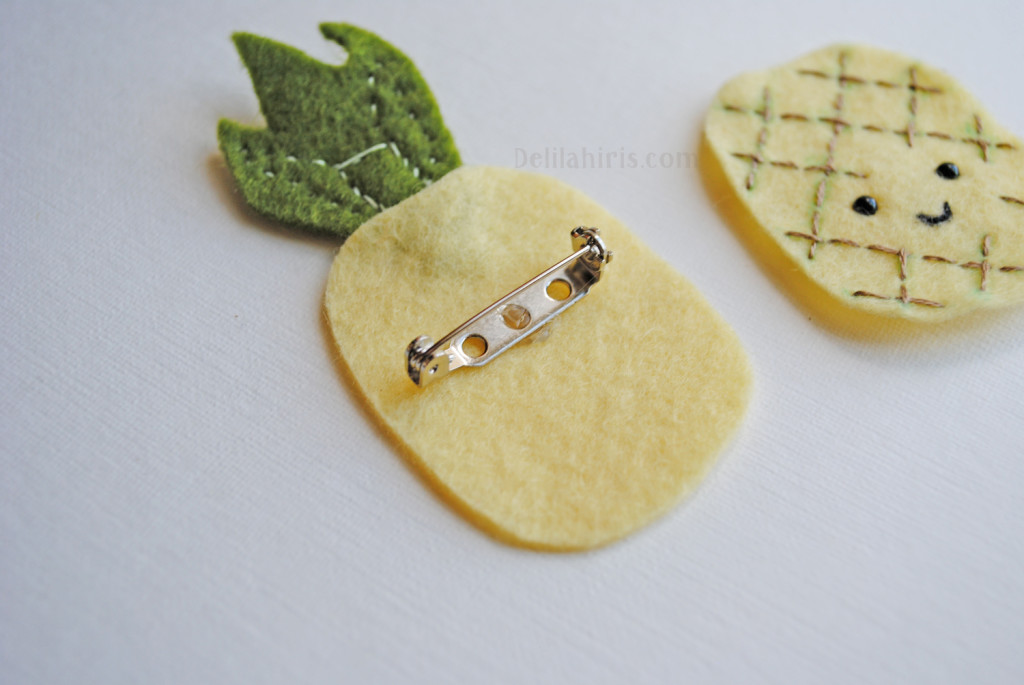
Secure the pin backing to the back of the brooch by first adding one very small bead of glue to the back of the pin (using a hot glue gun) and pressing it into place on the back of the brooch. Secure the pin backer further by stitching it firmly into place.
Then place the front and back of the brooch together and sewed the outer edges together. Viola!
Felt Pineapple Brooch
My favorite of the felt brooches – the sweet Pineapple felt brooch pin.
Begin by cutting the pieces from the pattern. Using the pattern as a reference draw on where you want the face and lines to appear on the front of the brooch.

Draw the cross hatched lines on the pineapple using a green or gold marker for contrast. I actually drew these on the front of the pineapple as I wanted them to show through for contrasting color.
Install safety eyes, or sew or draw/paint in the eyes and mouth.
Next I used a gold/tan colored embroidery thread to straight stitch in the cross hatched lines.

Time to assemble the pineapple top! Sew the middle piece of the top of the pineapple onto the back as shown below.

Place the last piece of the top of the pineapple on top and stitch into place.
Stitch the entire top of the pineapple onto the back part of the brooch.

Attach the pin backing to the back of the brooch. As above, with the strawberry, I used a small drop of glue to hold the pin in place. Stitch it firmly into place.

To finish the felt pineapple brooch place the front and back pieces together and sew the outer edges together.

Watermelon and Orange Felt Brooch
The orange and watermelon brooches are both made much the same as the above felt brooches!
1. Install the safety eyes or sew in a face.
2. Sew in some details (seeds)!
3. Attach a pin backing.
4. Sew the front and back parts of the brooch together!


I do hope you enjoy making my fun felt fruit brooches! Such a quick and fun summer craft project!
And I’d love to see your finished brooches! Visit me on Facebook and share what you’ve made! Or tag me on Instagram with #delilahirisfeltpattern.

