

Make Your Own Stuffed Elephant with my PDF Felt Elephant Sewing Pattern. This project is designed to be hand stitched from felt. This is a beginner to intermediate stuffed animal sewing project. Completed DIY tutorial takes approximately 2-3 hours to complete.
Recommended Tools And Supplies:
- Elephant Sewing Pattern
- felt (I like a wool/rayon blend)
- toy stuffing
- 3-6 mm doll eyes
- pipe cleaners or wire
- needle and thread
- small scissors
- stuffing tool (a chopstick works well!)
Begin by cutting all of your felt pieces as directed by the last page of the pattern. The easiest way to cut felt is
with a small sharp pair of scissors. For the greatest precision you could choose to trace the pattern pieces onto
the felt, iron some wax paper to the felt then trace onto that and cut, or tape the pattern pieces to the felt with
some wide clear tape, cutting through both tape and felt simultaneously.

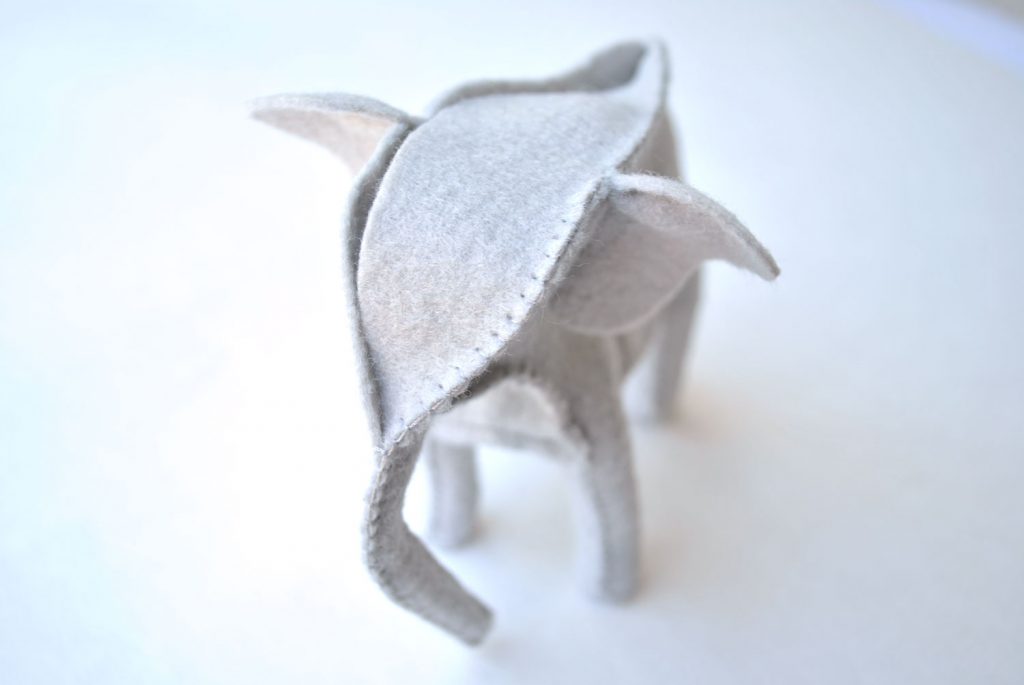
Trim along the ears as indicated by the pattern’s gray dotted lines. Flip the ear down and sideways to stitch
along the side of the elephant’s face. Pinch the top part of the ear down while stitching into place.
Install eyes by using either a 3-6 mm doll eye or stitch them in with thread or embroidery floss.

Cut in darts on the Middle Body piece, at the top of the legs and bottom of chest and rear as shown in the
illustration below. Match the darts together and stitch the edges back together keeping the stitching to the
inside of the elephants body.
Match one side of the “Under Body” piece to one of the main body pieces, pinning at the legs and belly. Begin
stitching from the back of the elephant down the back of the leg, attaching the main body and under body
pieces together. Stop and knot your thread at the bottom of the leg.

Place a stitch or two at the front of the back leg. Then pinch the leg open to place the bottom of the foot onto
the bottom of the leg. I sometimes insert a pen into the leg opening to hold it open, or pin the bottom of the
foot into place. Begin stitching from the front of the foot all the way around the bottom of the leg until you
reach the front of the leg again.


Continue stitching up the front of the leg and along the underside of the belly. When you reach the bottom of
the front leg knot your stitches in place and repeat the same steps to sew the bottom of the foot.
Continue sewing up the front of the leg and to the chest. Knot your stitches. Match the opposite side of the
body in place and pin at the legs and belly. Begin stitching once again at the back of the elephant, beginning
about 3/4 of the way down the back, stitching the opposite side of the body into place. Repeat all steps to
stitch the bottoms of the feet, etc.


Once you’ve reached the front of the chest once again, continue stitching past the chest and downwards
sewing the trunk together. Pause when you’ve reached about 3/4 of the way up the trunk. Now we’ll begin to
insert the wire armature.


Fold some wire or pipe cleaners in half. Then holding them against the legs of the elephant determine where
to fold the end of the wire inward to match the size of the legs. Bend each end of the wire downward where
the leg will bend downward. Insert the wire into the inside of the body so that wire extends into each leg. Do
this for both front and back legs.


Double up 2-3 pieces of pipe cleaner to push down to the bottom of the trunk, making sure to allow them to
extend into the face/head. Begin stuffing the legs with toy stuffing filling them to the top. Use a dowel or similar
tool to push the stuffing into the legs in small amounts at a time.
Begin stitching once again at the trunk moving upwards towards the face. Match the Middle face piece into
position on one side of the head and stitch into place. Switch to a running stitch when passing the ears. Continue
stitching until the end of the Middle Face piece.
Next to create a tail! You can use yarn or embroidery thread as I have. I matched up 3-4 pieces of gray
embroidery floss and knotted one end. Thread a large needle with your chosen tail fibers and pass it through
the back of the elephant where you want the tail to extend. Make sure the knot is on the inside to hold the tail
into place. Knot the fibers again at the end of the tail and trim any necessary length.
Begin stitching again at the front of the face, sewing together the opposite side of the head. Once you’ve
reached just past the head pause and stuff the head and body full. Continue stitching until there is only a small
space left open in the felt. Stuff as needed then sew the opening shut. Viola!


